When setting up a new ecommerce store, many merchants decide to change their store’s theme to something different to the default OpenCart theme. This can give your new store a design and feel that suites your industry and products perfectly, and can give you a more unique look. Although many store owners choose to have a bespoke theme created by a designer, many choose to purchase pre-built themes instead. Starting from around $30, these are a lot more affordable than a custom built theme and can be installed very quickly.
Today, we’ll be showing you a step-by-step guide to how to install a pre-built theme to your new OpenCart store. If you’re not fully comfortable with uploading files to your site, our recommended development partners will be more than happy to install a theme for you.
Please note, this is an example way to install a theme in OpenCart versions below OpenCart 2.2 - we'll be uploading another post very soon showing how to install a theme in newer versions. Some themes may need to be installed differently - remember to check the install instructions or contact the theme's developer before trying to install the theme.
Step 1: Purchase and download your new theme
There are thousands of OpenCart store themes available online to purchase, with more and more being created every day. You can purchase pre-built OpenCart themes on a large range of different websites, including the OpenCart Extension Store. Once you’ve found a theme that you’d like to use, purchase it and download the theme files. Remember to extract the files for your theme once you've downloaded the zipped folder.
Step 2: Upload the theme to your site
Upload the extracted folder to your site via FTP to the “catalog/view/theme” directory.
FTP (File Transfer Protocol) is used to quickly and easily upload/download files to your store via your store’s hosting server. You can use many different programs to connect to your store’s server (such as FileZilla). Make sure that you have the correct FTP login details for your site before trying to upload your new theme.
Step 3: Log in to your store’s admin area & go to settings
Once you’ve uploaded the files to your store, you’ll need to switch a couple of settings in your store’s admin area before your new theme will show. To do this, first log into your admin area - if you’ve just set up your store, your admin area will be set as www.example.com/admin
Navigate to System > Settings in your store’s admin area and select “Edit” next to your store.

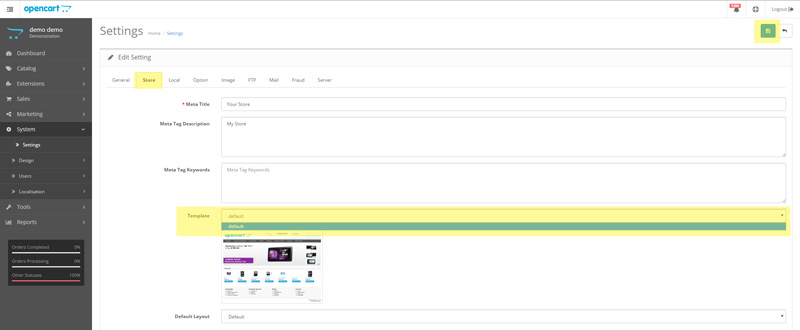
Step 4: Select your new theme
In your store’s settings, select the “Store” tab and click the drop-down menu next to the “Template” setting. Here you’ll be able to select the new theme that you’ve just uploaded. Once you’ve selected this, click “Save”.
Your new theme will now be uploaded and showing on your OpenCart store-front!
Tips
- When choosing your theme, make sure that the theme is compatible with your store’s OpenCart version number (e.g. 1.5.6.4). If you’re unsure if it is compatible with your store, double check with the theme’s developer before installing it.
- If you can’t see the new theme on your store straight away, clear your cache / cookies and refresh your store’s store-front.
- Depending on which theme you use, it may be likely that modules / any custom work that you’ve had done to your store may break after changing your theme - themes are created to work with the default version of OpenCart. If this happens, you’ll need to contact your developer or the developer of your modules to alter your store’s theme or features to work together.


Login and write down your comment.
Login my OpenCart Account