Opencart Advanced Registration


Opencart Advanced Registration
Opencart Advanced Registration module can be used to create registration fields for the customers. If you want to extend the customer registration form then this module is the best choice for you. Using this module you can extend the registration form by creating fields. Admin can create different types of fields like a select, radio button, text, file, etc.

Use case:
The admin can use this extension to extend his website's customer sign-up form, allowing him to collect more useful information from customers in addition to the default ones that are available on the sign-up form.
With this add-on, the admin will be able to add additional custom fields to the registration page. This allows the administrator to obtain any additional or critical information from the person who is registering on the site.
Text, text-area, date-of-birth, drop-down, multi-select, radio-button, media image, file upload, or dependable field are all available input types that the admin can use to create multiple custom fields.


Features Of Opencart Advanced Registration
Workflow Video
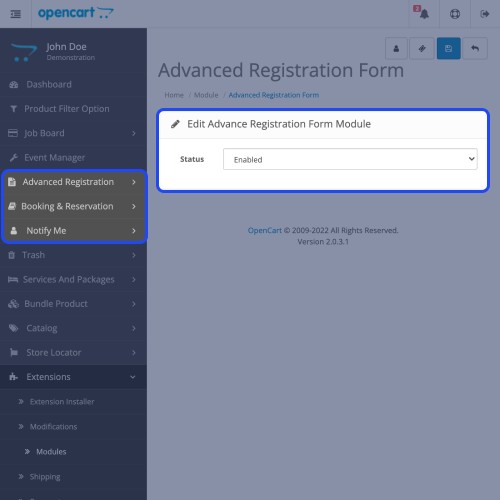
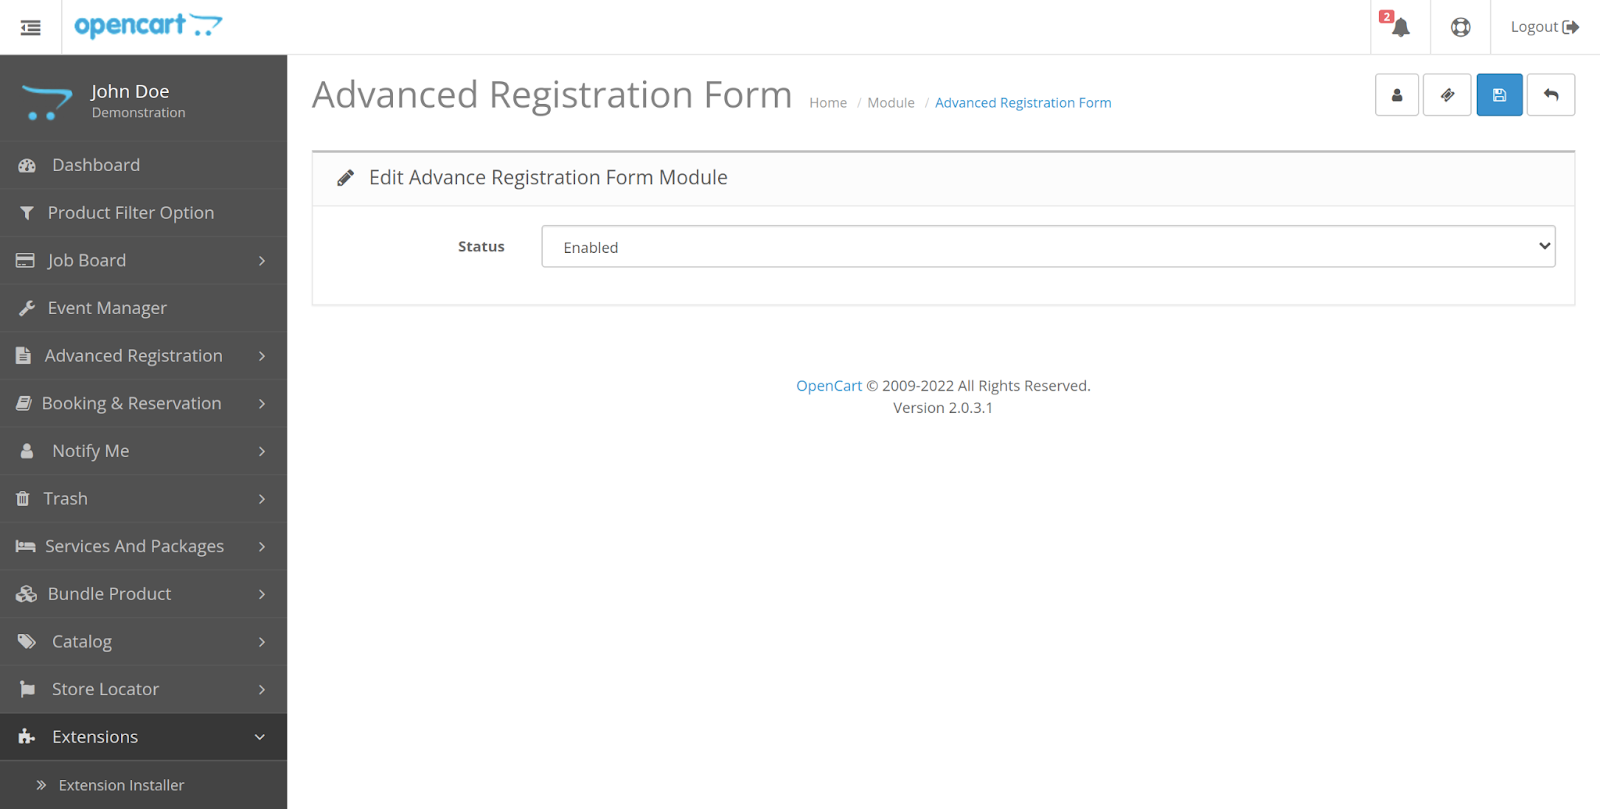
After the installation, the admin needs to configure the module and then he has to enable the module.
After clicking on the edit button admin can enable the module.
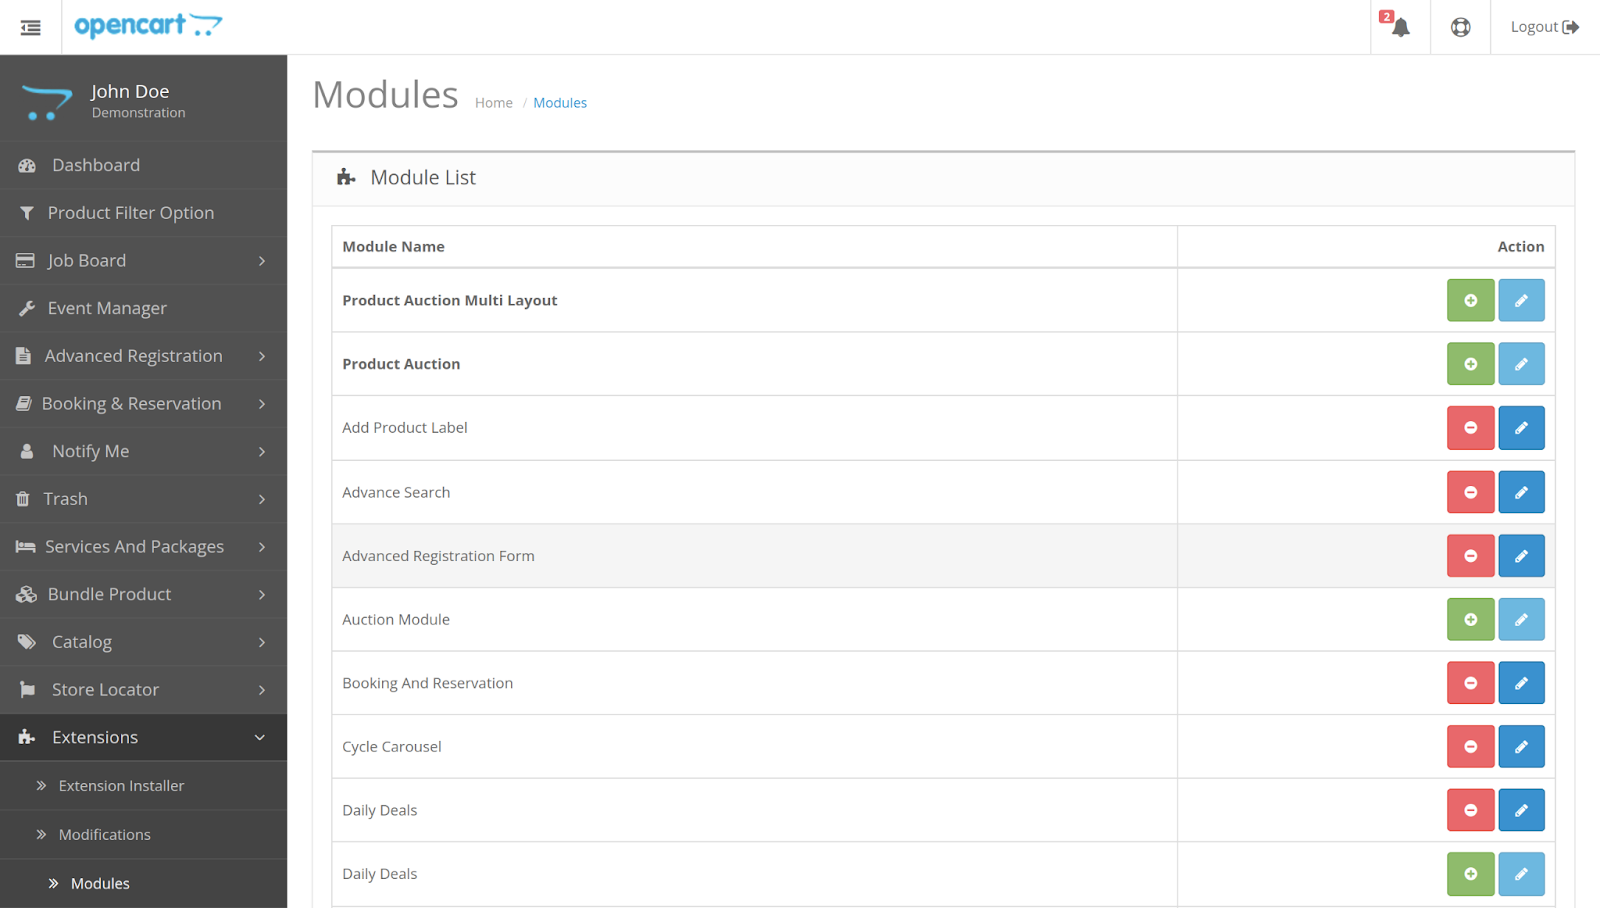
After clicking on it, the admin can find the Option to create fields and field status like this.
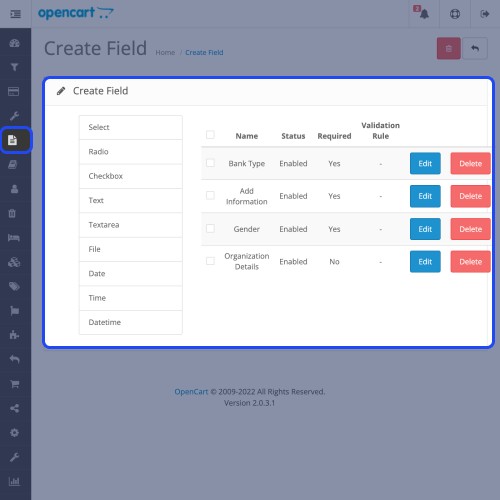
From here admin can click on the ‘Create Field’ option to create new fields.
From this section, the admin can see the list of created fields. Also, the admin can edit or delete the created fields.

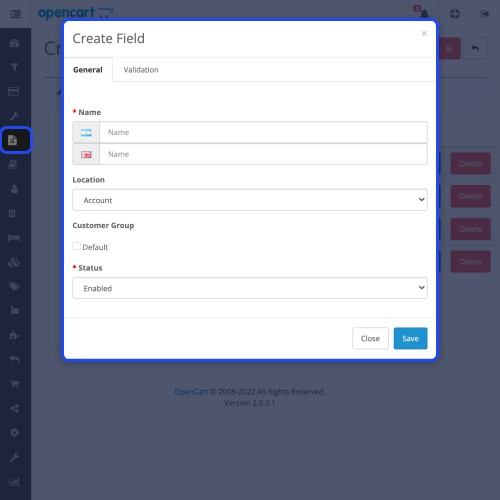
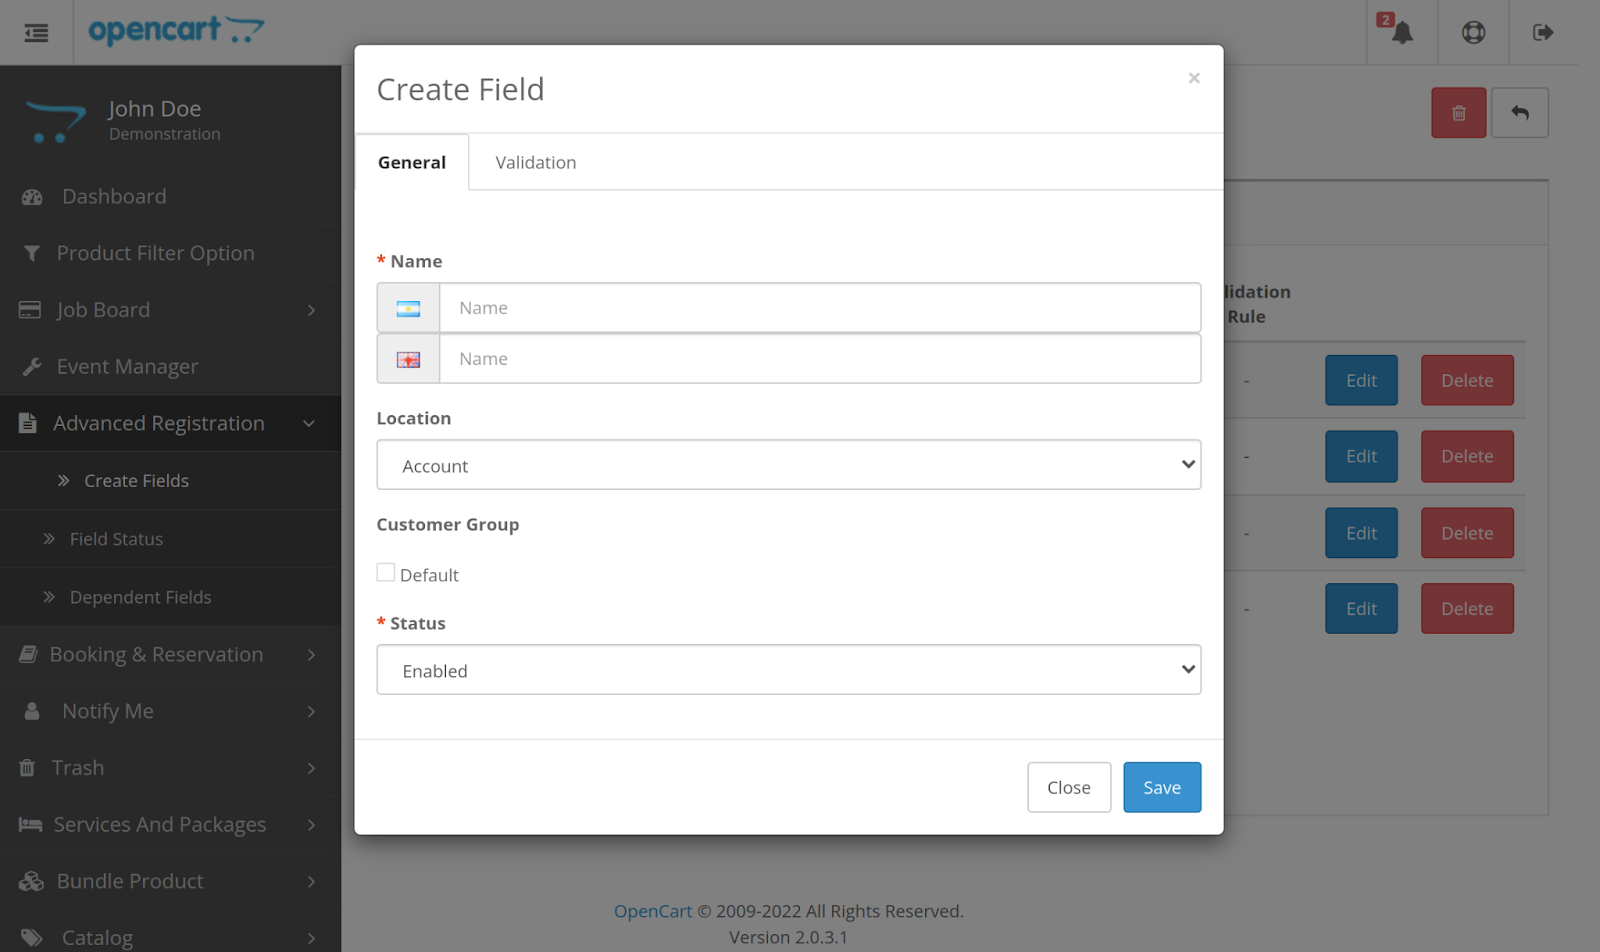
After selecting the field type, the admin will receive a pop-up to fill in the field information. Under the general tab, the admin will fill in the name, location, customer group, and status of the field.
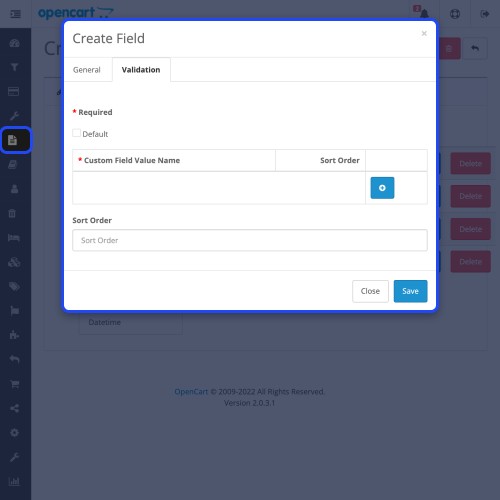
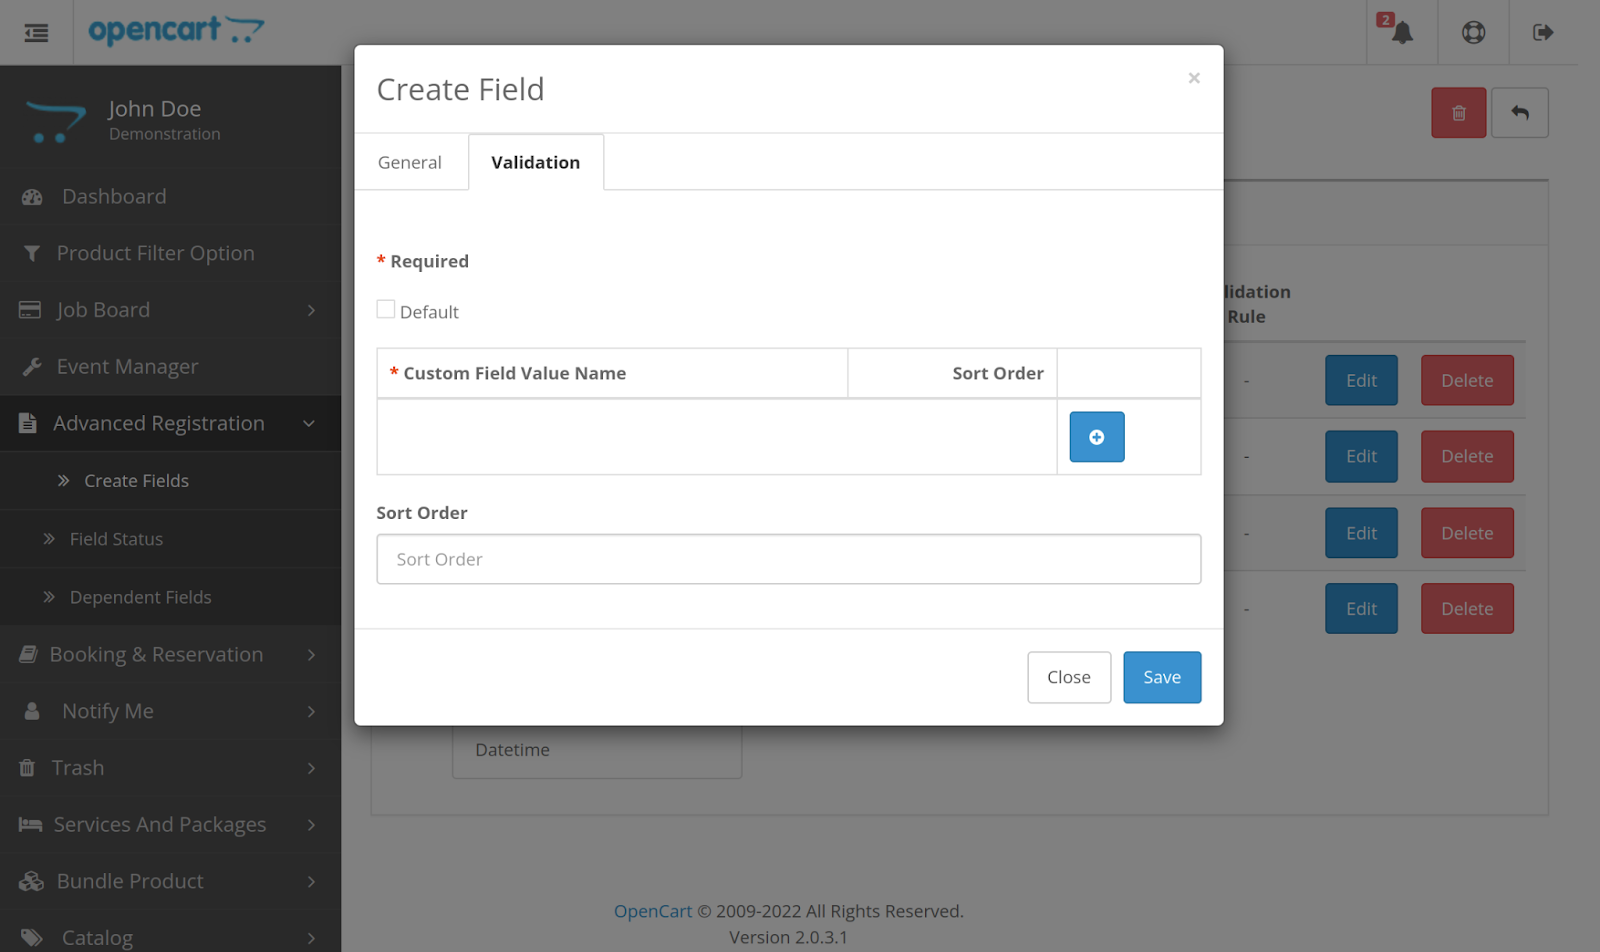
Under the Validation tab, the admin will fill in the validation details of the field.
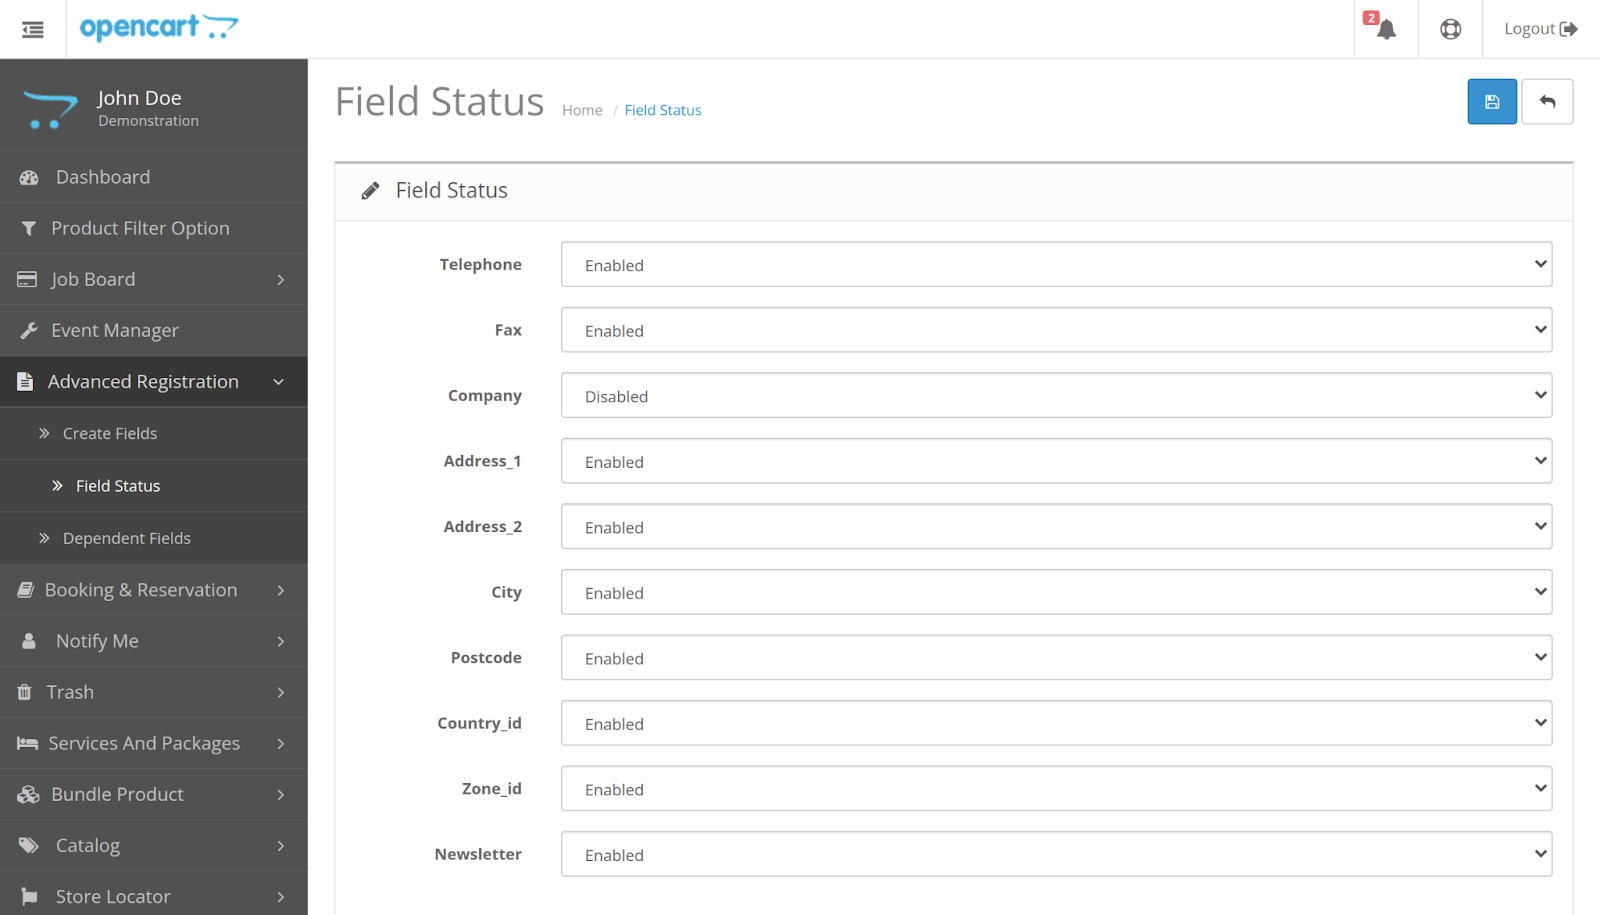
After creating registration fields admin can enable or disable the fields. For this admin can go to Field status. From here admin can also disable many of the fields which are already provided by Opencart.
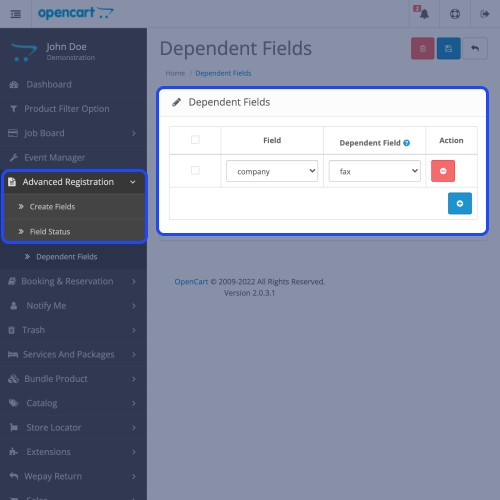
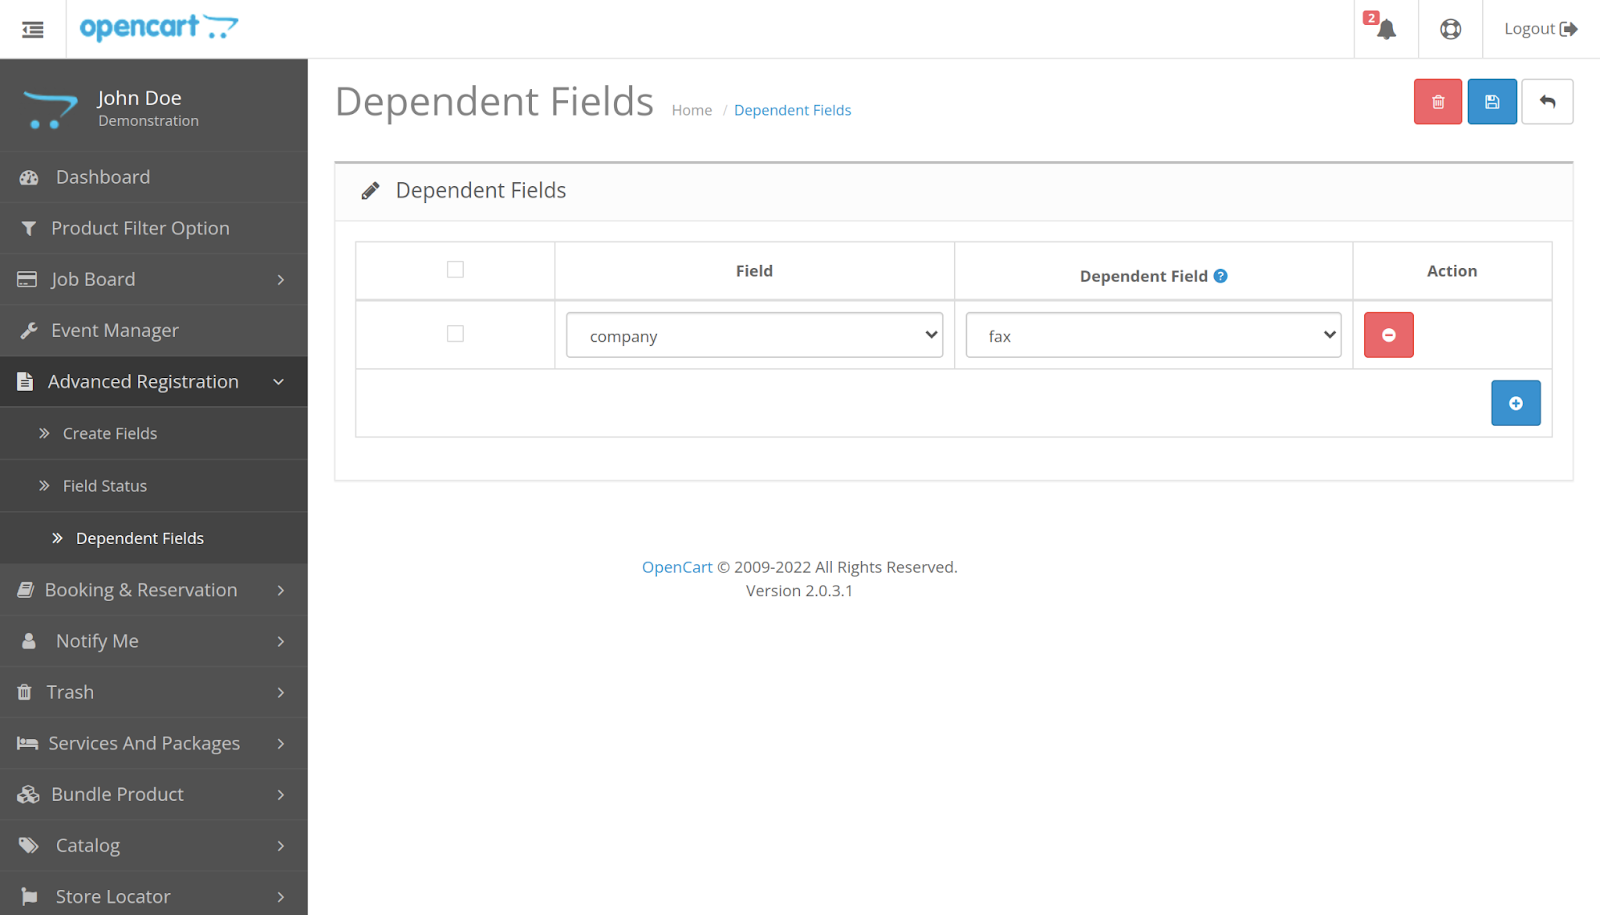
The admin can select the field which is dependent on another field. For example, a field country is dependent on the state field. Then select the country field as a dependent field and select the state as the field here.
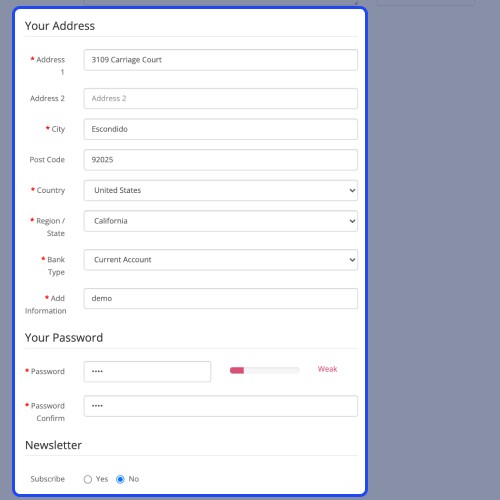
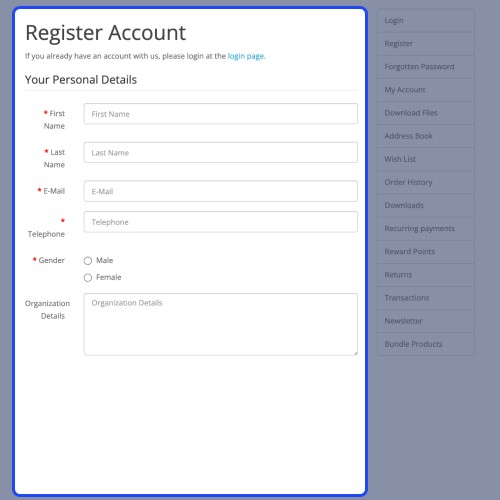
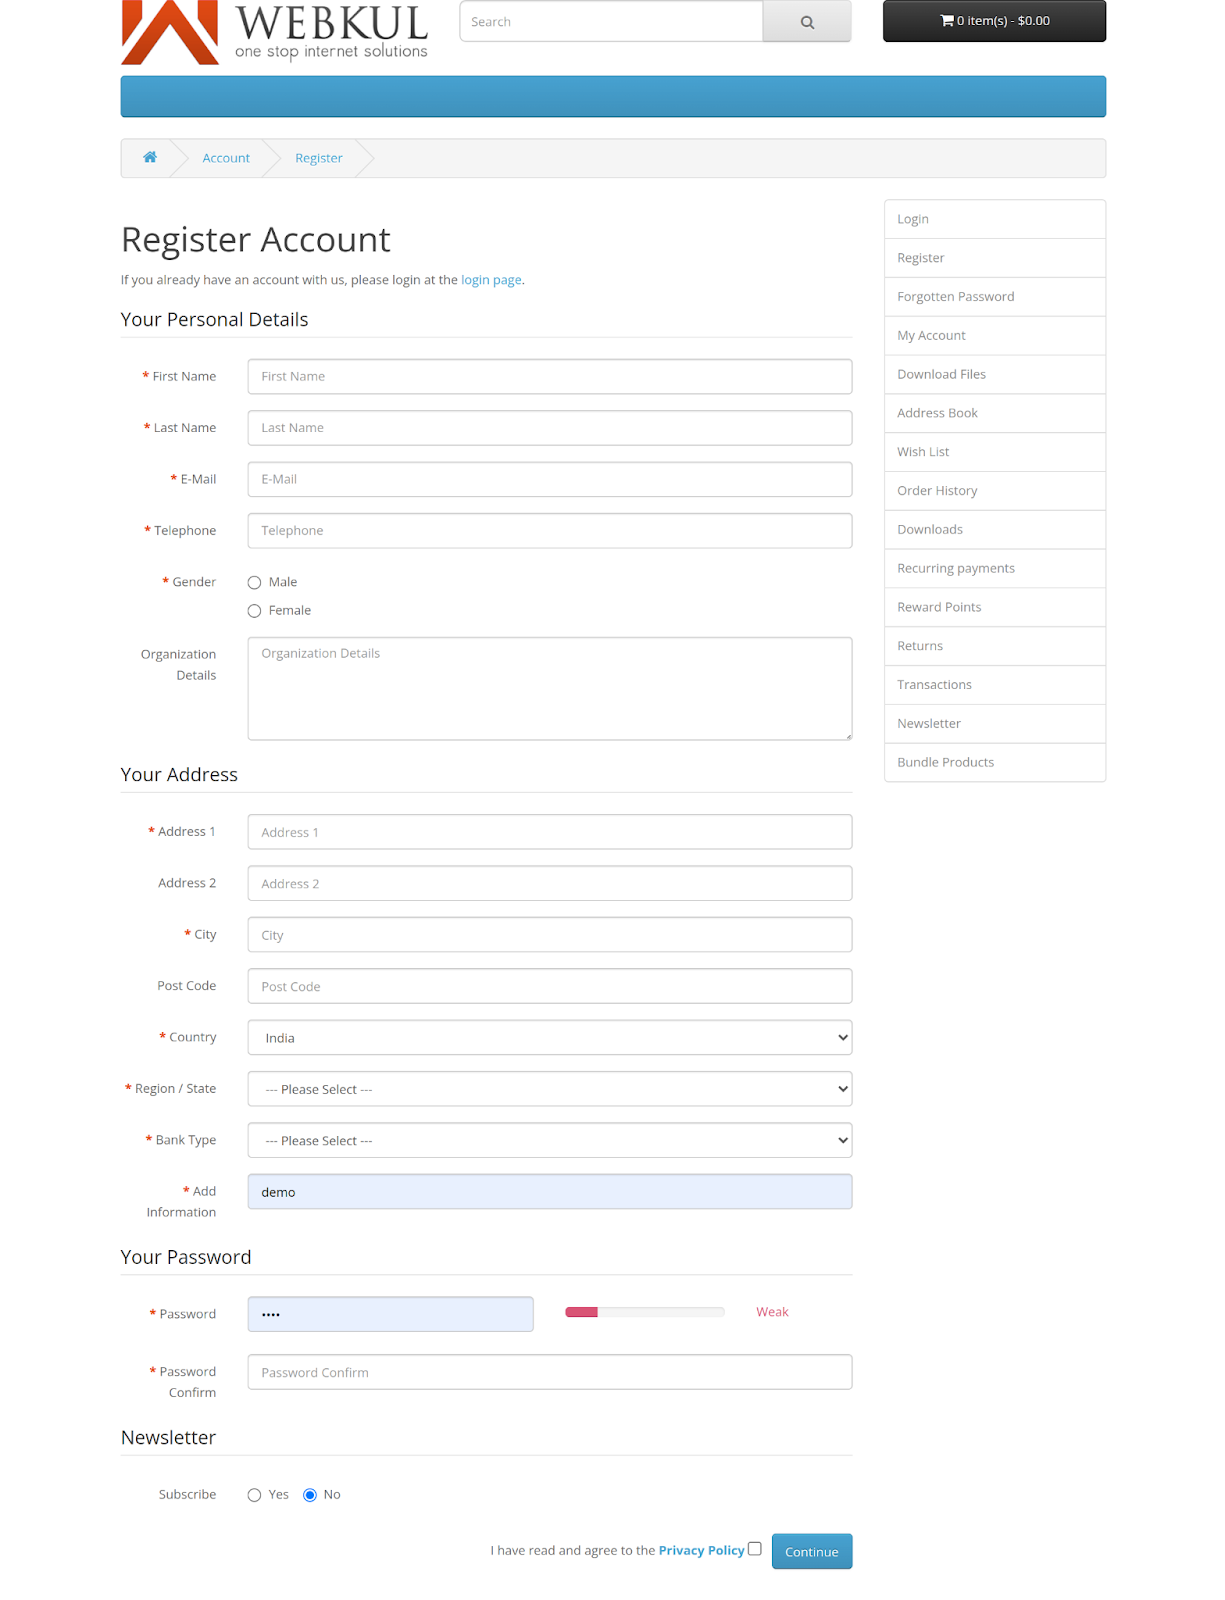
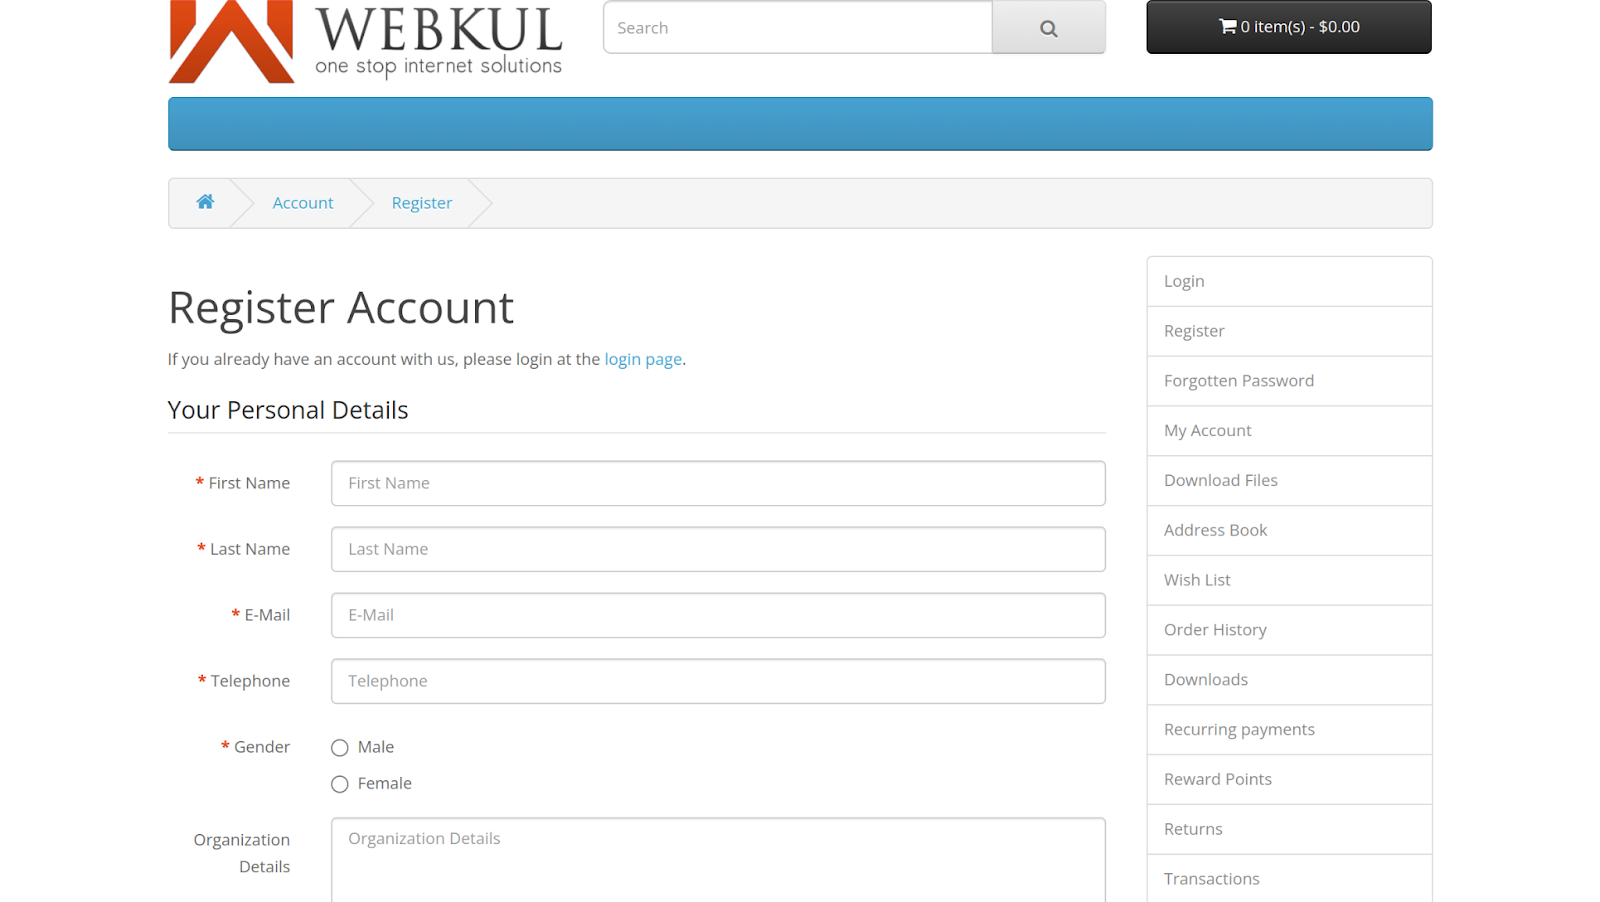
After creating registration fields customers can see the fields at the time of registration like this on the front-end.
All the registration fields are ajax based. The warning message for any field is visible right after the customer fills the field. For example, if a customer enters an email address then the warning message will appear right after the email is entered.
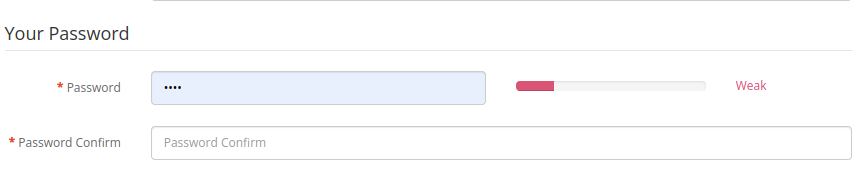
Customers can see the password strength meter when they enter the password.
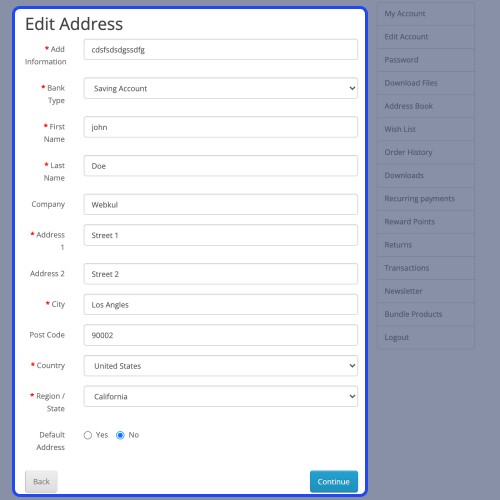
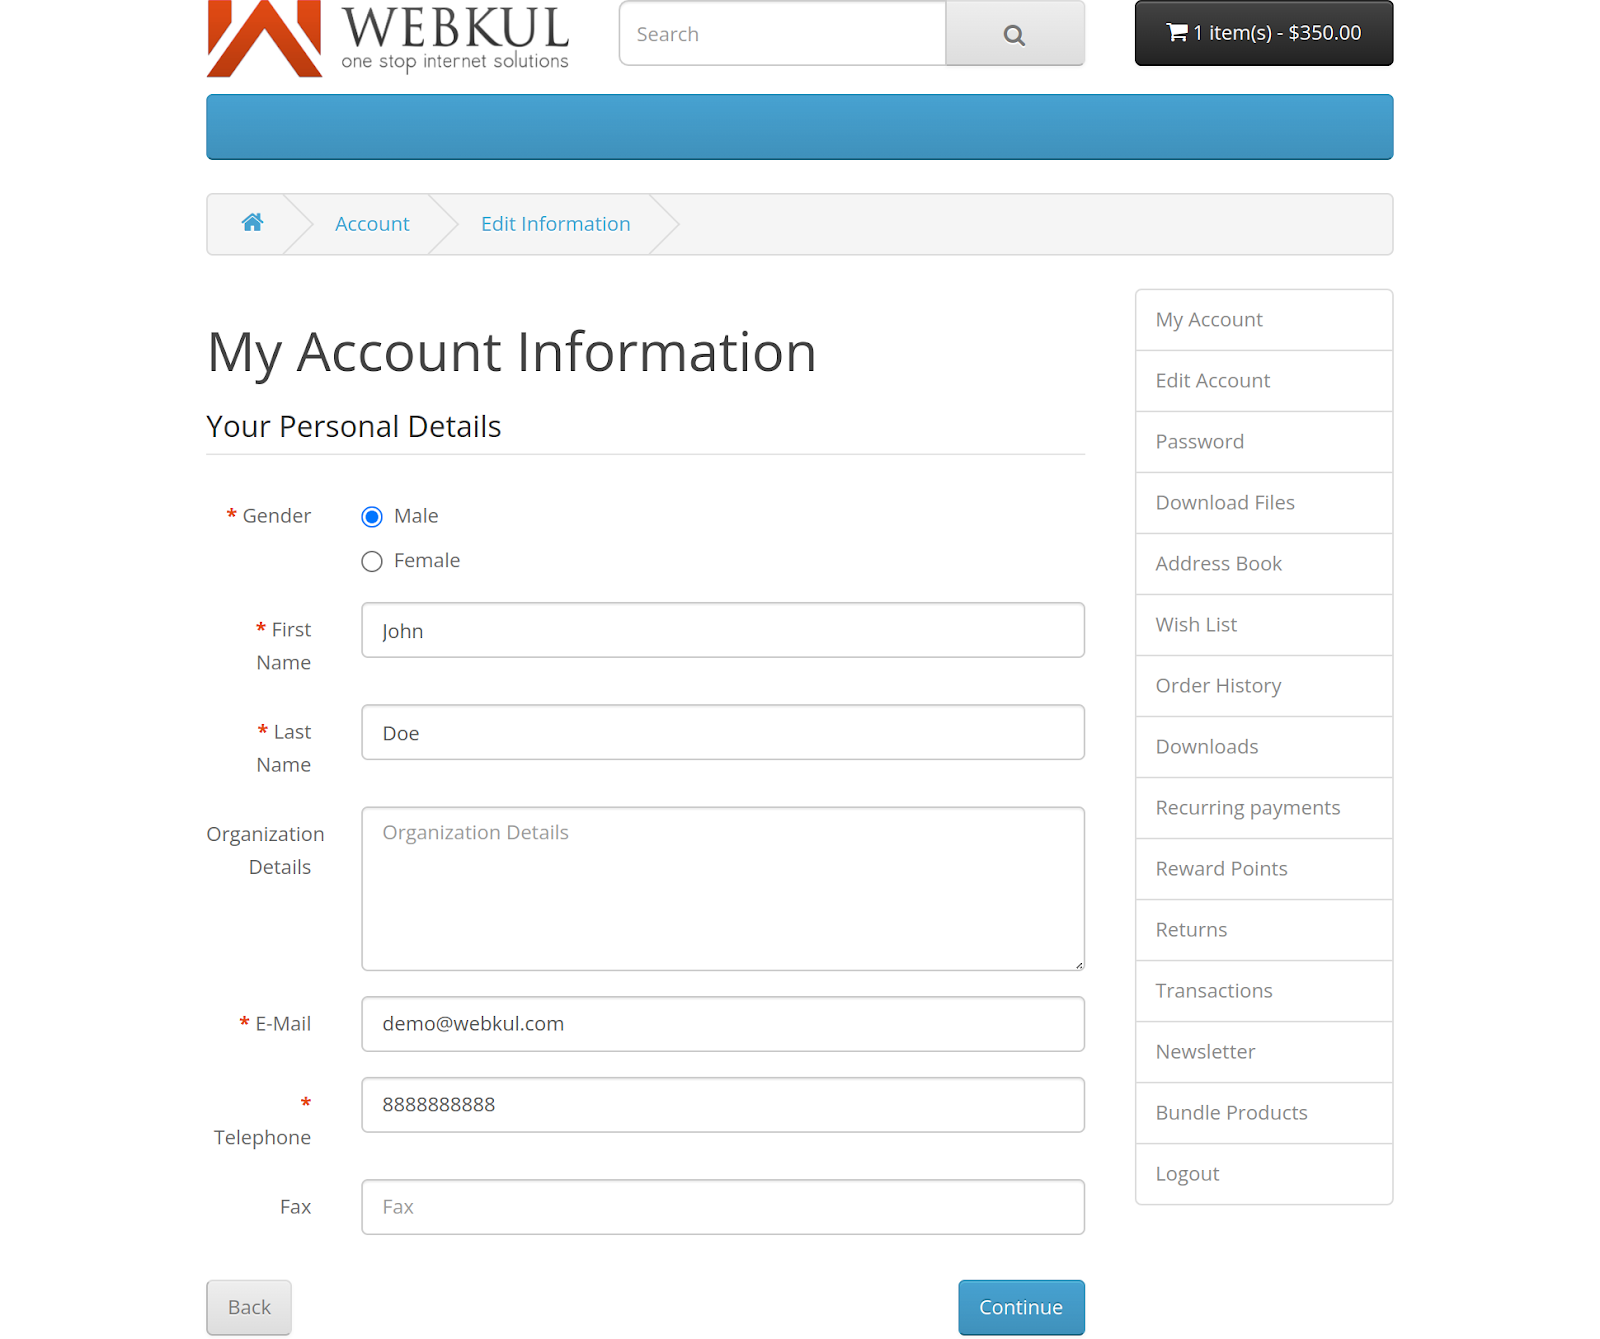
After registration, customers can edit the fields from their account section. For this customer need to click on the ‘Edit Account’ option in account menu.
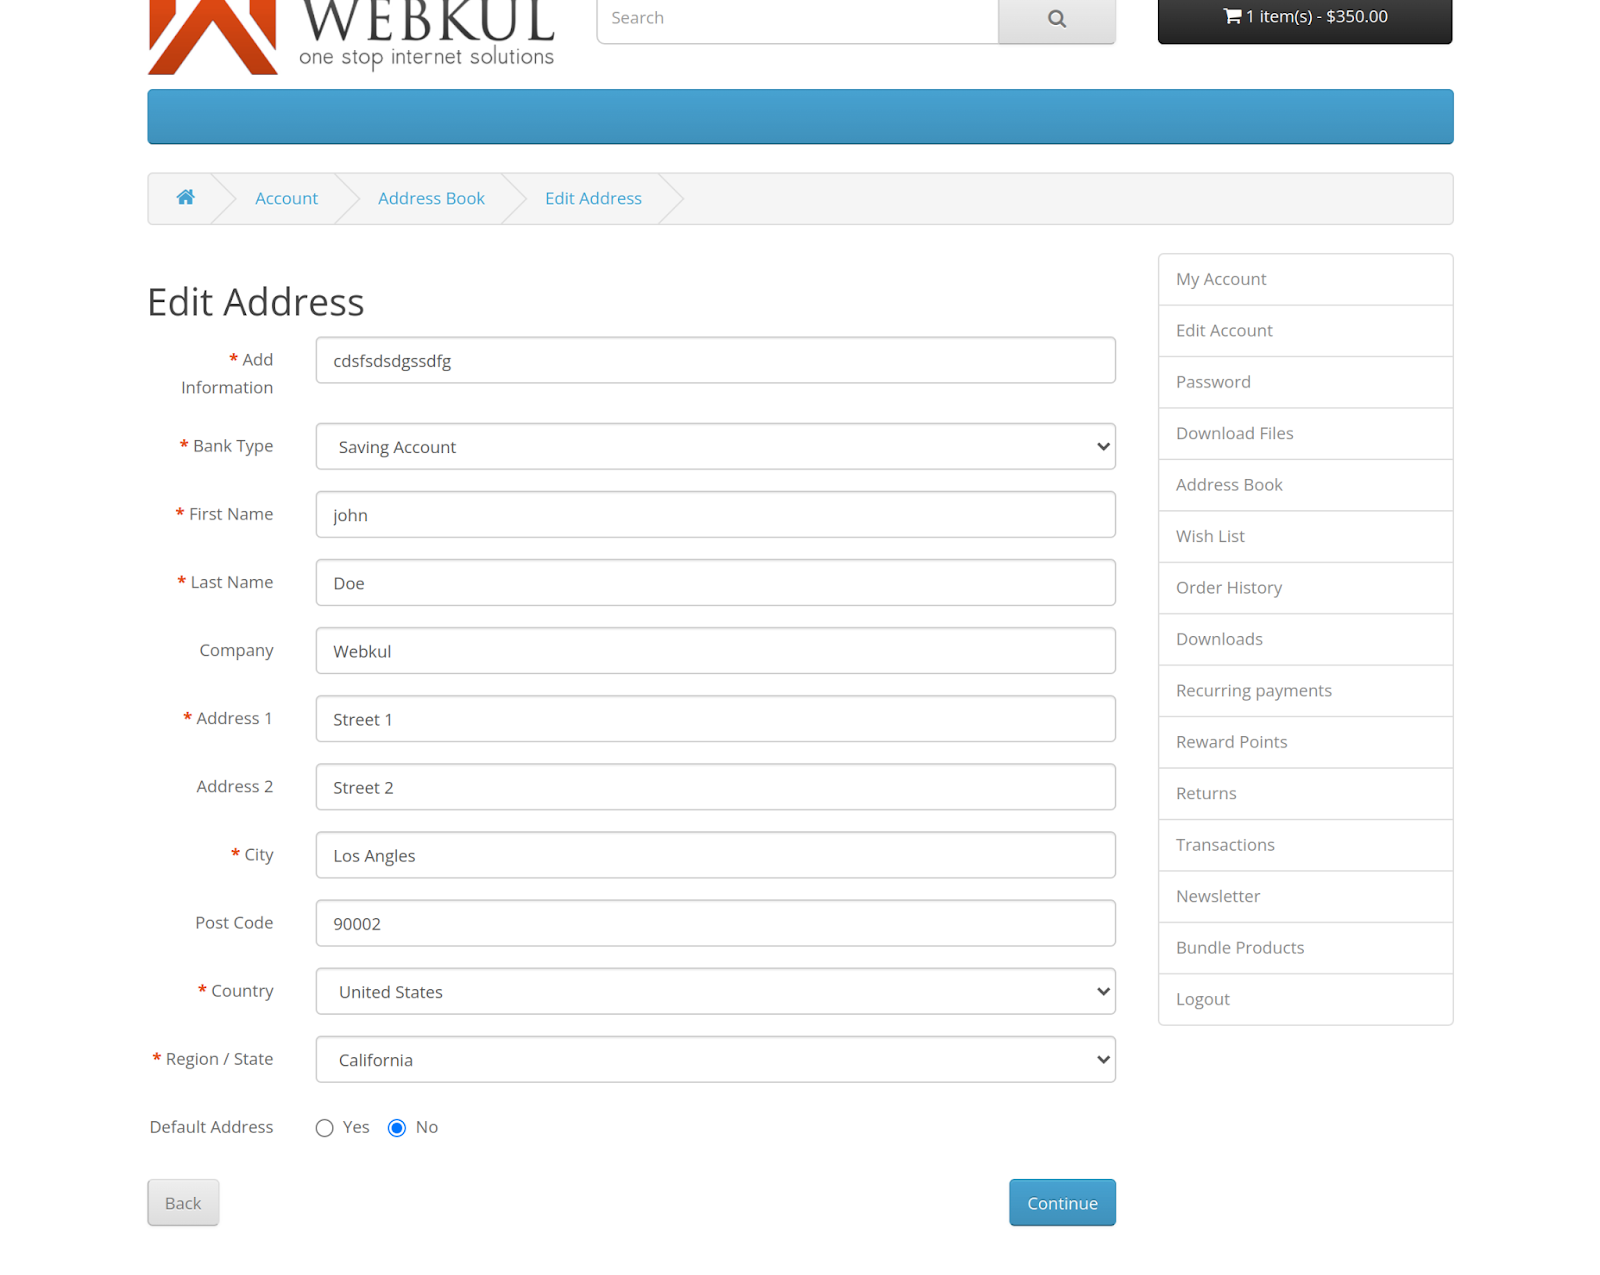
The fields which are under the address section can be edited by editing the address from the Address book.


Some Moments Of Appreciation


Support Policy
Opencart Advanced Registration module can be used to create registration fields for the customers. If you want to extend the customer registration form then this module is the best choice for you. Using this module you can extend the registration form by creating fields. Admin can create different types of fields like a select, radio button, text, file, etc.
Use case:
The admin can use this extension to extend his website's customer sign-up form, allowing him to collect more useful information from customers in addition to the default ones that are available on the sign-up form.
With this add-on, the admin will be able to add additional custom fields to the registration page. This allows the administrator to obtain any additional or critical information from the person who is registering on the site.
Text, text-area, date-of-birth, drop-down, multi-select, radio-button, media image, file upload, or dependable field are all available input types that the admin can use to create multiple custom fields.
Features Of Opencart Advanced Registration
- Easy to extend the registration form.
- No limit of creating fields.
- Admin can get more information about customers.
- Fields can be created with different input types.
- Admin can disable the fields without deleting them.
- Admin can disable a few of the default registration fields.
- Admin can select a customer group for each field.
- Admin can add validation for custom fields.
- Admin can create dependent fields.
- The fields are ajax based.
- Customers can see password strength meter while entering the password.
Workflow Video
After the installation, the admin needs to configure the module and then he has to enable the module.
After clicking on the edit button admin can enable the module.
After clicking on it, the admin can find the Option to create fields and field status like this.
From here admin can click on the ‘Create Field’ option to create new fields.
From this section, the admin can see the list of created fields. Also, the admin can edit or delete the created fields.
After selecting the field type, the admin will receive a pop-up to fill in the field information. Under the general tab, the admin will fill in the name, location, customer group, and status of the field.
Under the Validation tab, the admin will fill in the validation details of the field.
After creating registration fields admin can enable or disable the fields. For this admin can go to Field status. From here admin can also disable many of the fields which are already provided by Opencart.
The admin can select the field which is dependent on another field. For example, a field country is dependent on the state field. Then select the country field as a dependent field and select the state as the field here.
After creating registration fields customers can see the fields at the time of registration like this on the front-end.
All the registration fields are ajax based. The warning message for any field is visible right after the customer fills the field. For example, if a customer enters an email address then the warning message will appear right after the email is entered.
Customers can see the password strength meter when they enter the password.
After registration, customers can edit the fields from their account section. For this customer need to click on the ‘Edit Account’ option in account menu.
The fields which are under the address section can be edited by editing the address from the Address book.
Some Moments Of Appreciation
Support Policy
Price
$79.00
- Developed by OpenCart Partner
- 3 Months Free Support
- Documentation Included
Rating
Compatibility
3.0.0.0, 3.0.1.0, 3.0.1.1, 3.0.1.2, 3.0.1.3, 3.0.2.0, 3.0.3.0, 3.0.3.1, 3.0.3.2, 3.0.3.3, 3.0.3.5, 3.0.3.6, 3.0.3.7, 3.0.3.8
Last Update
23 Jun 2025
Created
5 Oct 2018
16 Sales
4 Comments

Login and write down your comment.
Login my OpenCart Account