Create a New OpenCart Store in 5 minutes with ScalaHosting
Opencart offers an easy solution to quickly start your store without need of any technical knowledge, this guide will show you how to get your store in few minutes and basics of how to configure it.
Create your Store
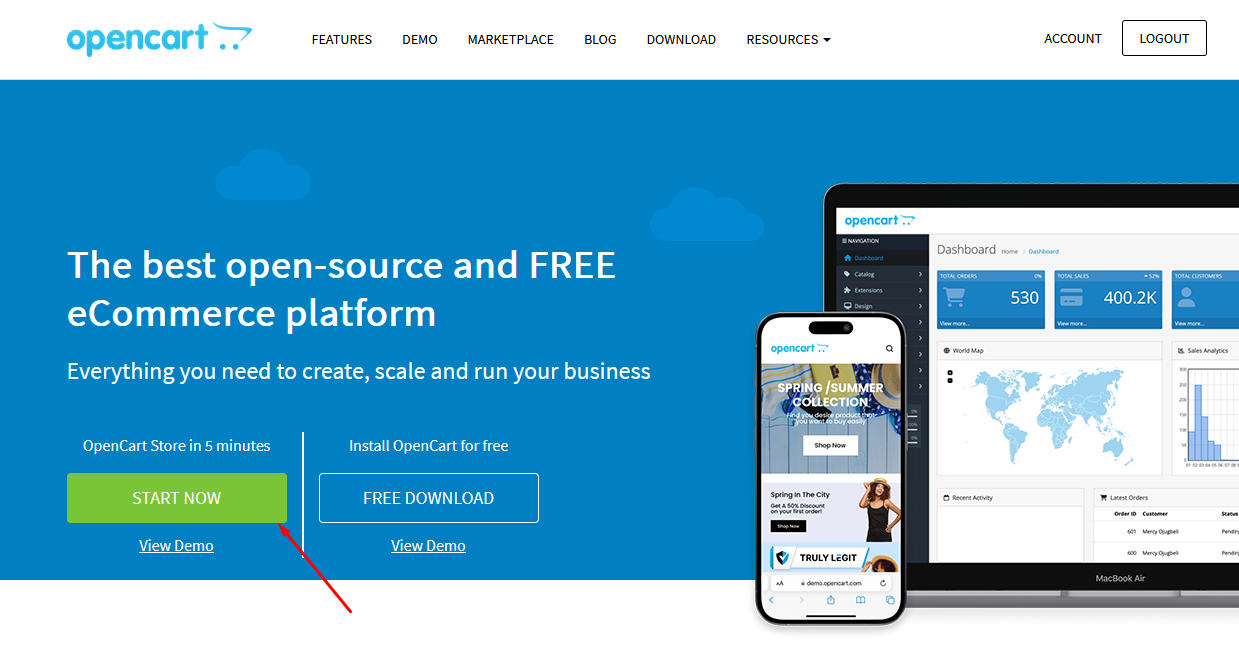
- Go to homepage of opencart.com
-
Click on Start Now button
 Choose a temporary domain (once your account created you will also have possibility to have your own domain)
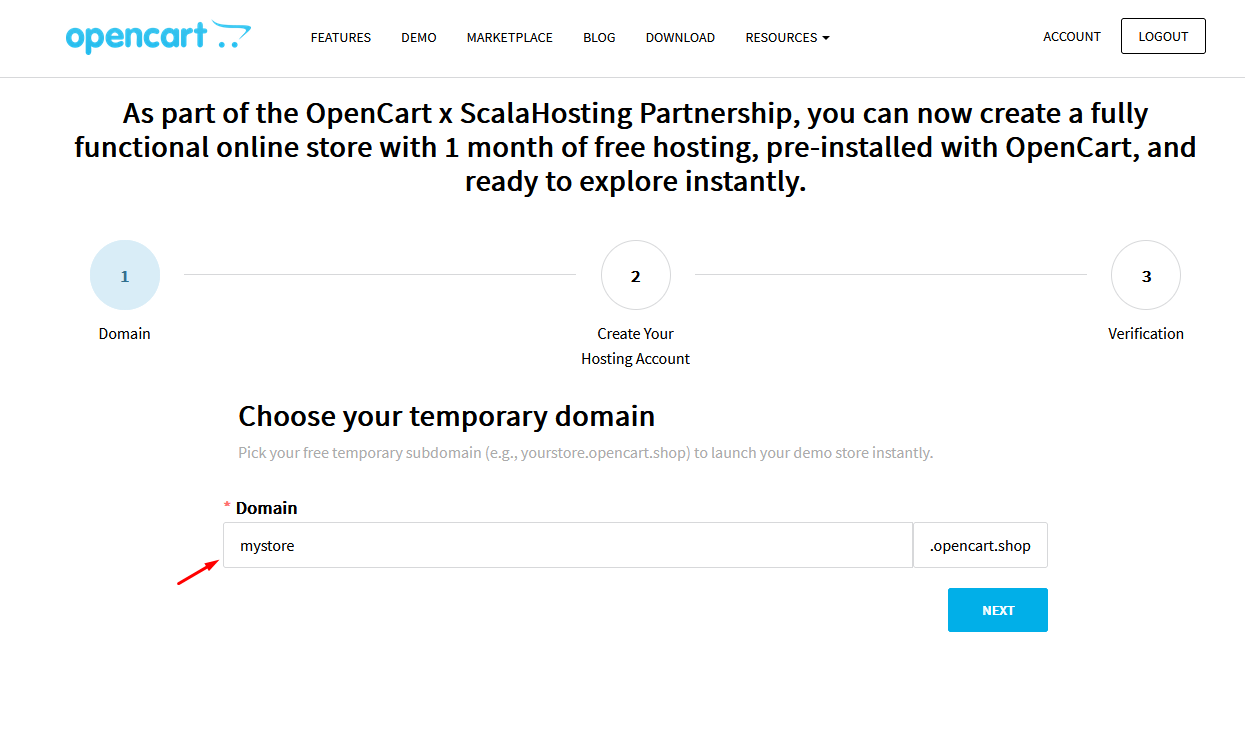
- Fill up your personal details and your login credentials (use strong password)
- Wait until the process ends, your store is now ready to use! You will receive an email with your credentials and urls to access hosting and opencart admin.
Configure your store in Admin
First look your email containing the credentials, click on the link below “OpenCart Admin (Store Backend)”, it looks like this: https://*******.opencart.shop/admin/
Enter your credentials, now you are in your OpenCart admin section, the first time you access you will see the following popup.
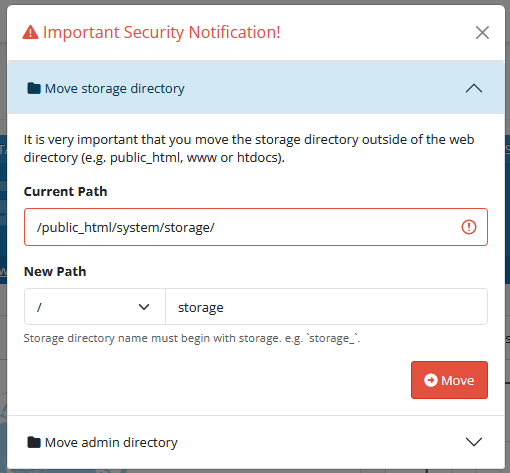
This is important security measures, if you have the possibility to move the storage folder outside of public_html/ then select correct new path and click on move, if you don’t have possibility to move outside of public_html then rename storage to something with random name, for example: storage7Xa5c8EOVS3.
Then the second security measure is to Move the admin directory, the objective is to make it hard to guess, you can also add some random code for example admin41eUB9TP.
Once done instead of accessing your website admin from
https://*******.opencart.shop/admin/ you will access from
https://*******.opencart.shop/admin41eUB9TP/Then and for next connexions you will directly access to the dashboard, from there you will be able to manage all settings, categories, products, informations of your store.

Set your store details
- Go to System > Settings, click Edit on your store.
-
In General tab set the details like store name, image, icon, etc.

- In Store tab you can configure your company details like address, email, phone.
- In Local tab you can set up the store country, region, currency, length/weight classes (important for shipping).
- Once all set up click Save button on top right.
Access to the public website
The default store is loaded with demo categories and products so you can see how it looks like and then edit or add your own products and categories.
To access the public website click on your icon on top right corner and on your store.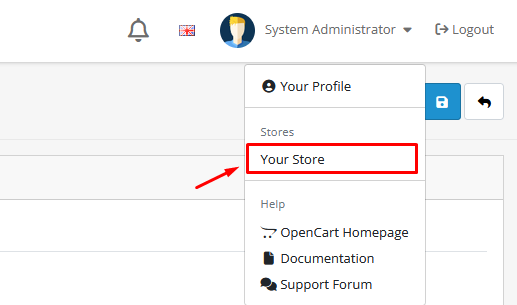
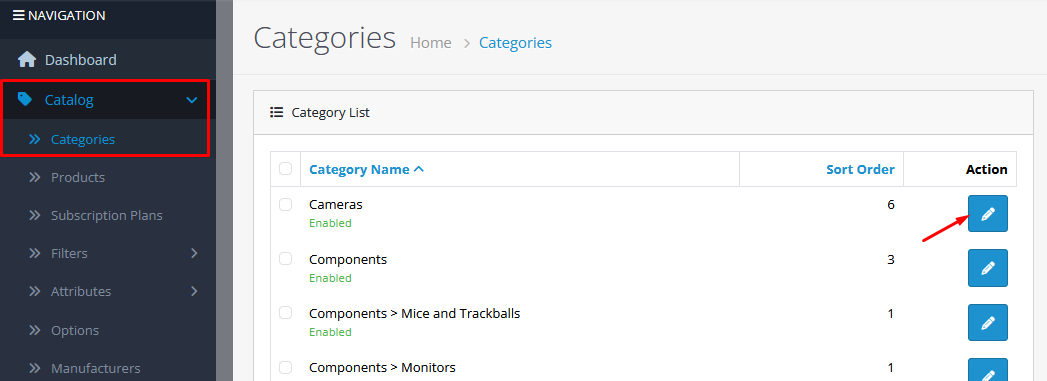
Manage categories
On the left menu click on Catalog > Categories, click on edit button to edit a category, or + button to add a new category.
Manage products
On the left menu click on Catalog > Products, click on edit button to edit a product, or + button to add a new product.
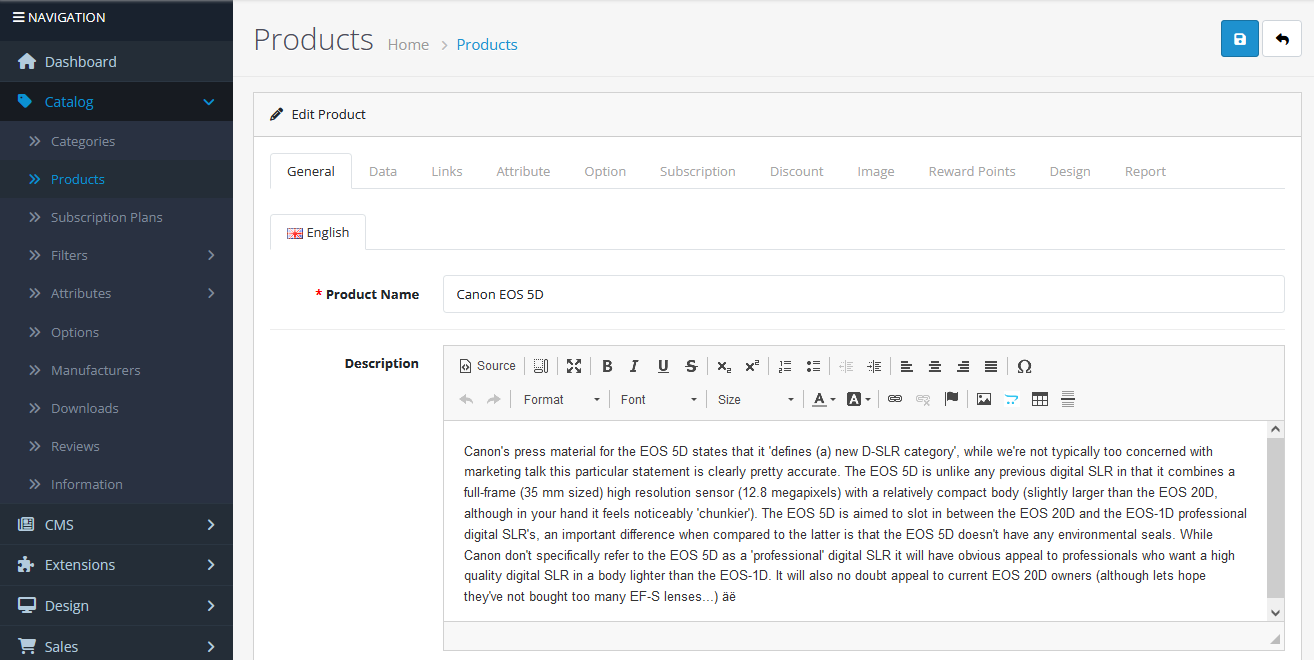
For a basic product you can enter the following data:
General tab
- Product name
- Description
- Meta tag title (name that will appear for search engines and on the browser tab)
Data tab
- Model (an unique identifier for the product)
- Price
Links tab
- Manufacturer if any (these can be added from Catalog > Manufacturers)
- Categories (where the products will appear)
Image tab
- Image (main product image)
- Additional images if any
Once your product is saved you can go to the public website and refresh the page to see your changes.
Payment methods
You can manage payment methods into Extensions > Extensions > Payments.
From there it’s possible to quickly install Paypal to start to accept card payments. For other payment methods you can go into Extensions > Marketplace to search for other methods.Manage the orders
Once there are orders they will be handled from the Sales > Orders menu.

The process of orders is generally the following:
- Click on view (eye icon)
- Check the details and prepare shipment
- Go to History section at bottom of the page
- Choose the correct order status (e.g. Shipped), add comment if necessary and click on Add history button
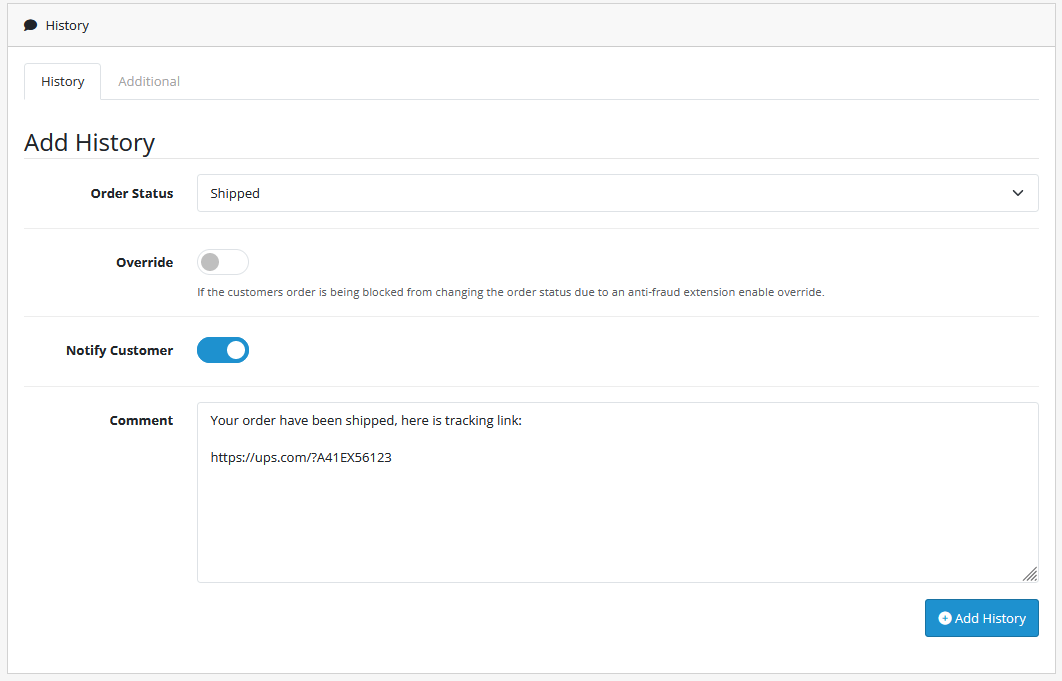
The customer will receive the information about the order update.