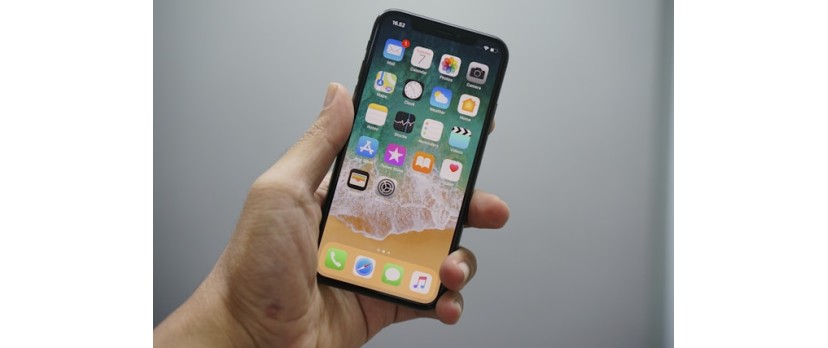
You decide to launch a product business, or maybe you already sell goods, but never set aside funds for professional photos? That’s totally fine. If you set a clear goal and want to improve how your products look online, you can take product photos with your iPhone.
You don’t need a $5,000 DSLR setup, as the latest iPhones already include camera systems that rival many professional tools. You can shoot clean macro product photography, wide-angle full-scene compositions, and even smooth commercial-style video, without stepping outside Apple’s ecosystem. And if you edit the material afterward, your final shots won’t look far off from studio quality.
This guide covers everything you need to know about iPhone product photography. If you’re ready to start, grab your iPhone, and let’s get into it.
Can You Get High-Quality Product Photography With an iPhone?
Absolutely. iPhones have been serious camera contenders for years, and each new model keeps raising the bar. With the iPhone 13, Apple introduced macro shooting and ProRes video. The iPhone 14 bumped up to a 48MP sensor for sharper details and better low-light shots. And the iPhone 15 Pro Max added a 5× telephoto zoom and even stronger dynamic range. The iPhone 16 refined everything further with a new 48MP “Fusion” sensor and extended optical zoom range, giving users the flexibility to shoot wide or close with consistent clarity.
Product photography fills up your storage quickly, especially when shooting in ProRAW or ProRes. If your device is running low, here’s how to get more GB on iPhone so you don’t run out of room mid-shoot.

Source: Versus (YouTube)
Well-known creatives have already proven what the iPhone camera can do. TIME Magazine published several covers photographed entirely on iPhones by Luisa Dörr. Rachael Short, a fine art photographer, relies exclusively on her iPhone for gallery-level work. Even wedding photographer Sephi Bergerson shot a full multi-day wedding in India using only an iPhone. Their results show that with proper use, iPhones deliver professional-grade photography.
No phone nails a perfect shot straight out of the box. You can’t point your iPhone at a product, tap the shutter, and expect magazine quality results. Great product photos depend on strong composition, smart lighting, and some post-processing. That’s where this guide comes in. We’ll walk you through every step so you can shoot polished, high-quality product photos with your iPhone without fancy studio or gear.
How to Take Product Photos With an iPhone
We’ve put together straightforward, hands-on tips to guide you through taking product photos with your iPhone. Work through each tip in order to see how the process fits together.
Before we started, you should set a clear goal. Know what kind of shot you need before you lift your phone. Are you going for clean and simple, like something you’d see on Amazon? Or do you need something with more flair - props, color, and texture for Instagram or Pinterest? Pick a direction and stick to it.
Then get the product ready. Wipe off dust, fingerprints, and sticker residue. Fix anything that looks off. A tiny scratch or speck will show up in the photo, no matter how small it seems in person.
Once you’ve sorted that out, you can move on to the shoot. Your iPhone’s got the tools. What you do with them is up to you.
Step 1. Clean the Lens and Set Up the Scene
Getting your product ready is only the first step. If you want sharp, clean photos, you also need to prepare your main tool (the iPhone) and everything that supports the shot. That means checking the camera, setting the lighting, and locking in the environment around the product. Here’s what to do before you press the shutter:
Even a tiny smudge can blur the entire photo. Take a microfiber cloth and clean the camera lens gently. If you see streaks, breathe lightly on the lens to add a bit of moisture, then wipe again. Never use your shirt or tissue, as it can scratch the glass or leave lint behind.

Source: Unsplash
Good light matters more than a good camera. Place your setup near a window that gets soft, natural light. If shadows fall too harsh, hang a thin white curtain or tape up some baking paper to diffuse it. No daylight? Use a small LED lamp. Aim the light at the wall or ceiling to bounce it and avoid glare on the product.

Source: Freepik
For most product shots, you don’t need a studio backdrop. A white sheet of paper, a neutral poster board, or a clean wooden surface works fine. Tape a second sheet behind the product to curve the background and remove any hard edge between the surface and the wall. If you want a bit more style, add props (but only if they match the tone and don’t pull attention away from the item).
Handheld shots often lead to soft focus or uneven angles. Use a tripod to keep the phone steady. If you don’t own one, stack books and lay the iPhone flat against something solid. Tap the screen to lock focus, then use a timer to avoid touching the phone mid-shot. Every frame should follow the same angle and distance for a clean, consistent series.

Source: Freepik
Open the camera and look through it. Does anything in the frame distract from the product? Are there shadows, dust, or crooked lines? Fix it now. The iPhone can capture great detail, but it won’t fix a messy setup.
Step 2. Adjust iPhone Camera Settings
Now we move on to the most important part - how to take product photos with an iPhone using the camera settings available to you. We’ve listed several tips here. Some may fit your setup perfectly, others may not. Test them and decide which ones help you get the results you want.
Your iPhone has three lenses: Ultra-Wide, Wide, and Telephoto. For product photos, go with the Wide or Telephoto lens (they give you the cleanest, sharpest shots without weird distortion). The Ultra-Wide lens is better for larger items or when you want to pull in more of the background.
Tap your product on the screen to set focus. You’ll see a yellow box and a sun icon appear. Slide that sun up to brighten or down to darken. To lock both focus and exposure, press and hold until “AE/AF Lock” shows up. That step prevents the camera from auto-adjusting while you shoot.

If you use an iPhone 12 Pro or leter Pro models, go to Settings > Camera > Formats and turn on Apple ProRAW. ProRAW grabs extra data for each shot so you can tweak color, brightness, and sharpness later (just remember those files take up more storage).

On iPhone 13 Pro and later, the camera switches to macro mode when you move close to a subject. This feature improves close up product photography by capturing fine details, but it can also soften your shot if you lose stability. To control it yourself, open Settings > Camera and disable Macro Control.

Finally, turn on the Grid in Settings > Camera. A 3×3 overlay helps you line up your product using the rule of thirds or keep vertical and horizontal lines straight. A properly framed photo feels more polished and directs the viewer’s eye right where you want it.

If you’re shooting product videos and you’ve got a 13 Pro or leter Pro model, use ProRes. It gives you cleaner footage, better handling of light, and way more room to edit later. Go to Settings > Camera > Formats and flip on Apple ProRes. Then, in the Camera app, switch to Video and tap the ProRes label at the top. If your iPhone has less than 256 GB of storage, you will need to connect an external storage device for shooting.
Step 3. Edit Your Product Shots With iPhone
Once you take your shots, don’t skip editing. Even a well-lit, sharp photo often needs small adjustments to look clean and polished. You don’t need to use complicated software, as the built-in iPhone editor covers most basic fixes.
Open any photo in the Photos app and tap Edit. You’ll see controls for brightness, contrast, shadows, saturation, and more. Adjust these sliders with care and don’t push the brightness too high or drop the exposure too low (extreme edits ruin texture and color accuracy).

Use the crop and straighten tools to fix any tilted lines or unwanted background edges. For example, if your background leans to one side, correct it now. Center your product and remove distractions from the frame.

One of the best features in the Photos app allows you to copy edits from one photo and apply them to others. After editing your first image, tap the three-dot menu and choose Copy Edits. Then open the next photo, tap the same menu, and choose Paste Edits. This saves time and provides a uniform look across your entire product gallery.

If you want more options, export the photos and drop them into Lightroom or Snapseed. These apps offer more precise tools, but they also come with a learning curve. Stick with the iPhone editor unless you feel ready to dig deeper.
If the product looks the way it does in real life, you’ve done it right.
Step 4. Export in the Right Format
After you finish editing, don’t just throw your photos into an upload folder and hope for the best. Platforms have their own rules, and skipping the export step can mess up your presentation.
If you’re putting photos on a website (yours or anyone else’s), check the size first. Big files slow things down. Nobody wants to wait five seconds for a page to load just because one image weighs two megabytes. You don’t need to crush the quality, just shrink the file a bit. Squoosh works, ImageOptim’s solid too. Or just tweak the export settings in Lightroom Mobile. Try to keep each image around 300 KB. If you really need full res, fine, but most of the time you don’t.
Don’t leave your file names as “IMG_9023.JPG” or whatever the phone spits out, and rename it to something that makes sense, like powder-white.jpg. That way, when someone sees the file (or a search engine does), they know what it is without opening it. The Photos app doesn’t let you rename files. So, share the image to the Files app first. Save it there, find the file, press and hold on the name, and pick “Rename.” Type in something that actually describes the photo. Takes five seconds and looks a lot better when you send it to a client or post it online.

If you’re sending product shots to Amazon, Etsy, or a client, they’ll probably want them in a .zip file. Photos doesn’t do that, so here’s the move: save the images to the Files app first. Open one, hit Share, choose Save to Files - done. Then jump into Files, select what you need, tap the three dots, and hit Compress. You’ll get a .zip file right there. Rename it if you want, then send or upload it. No laptop needed.

And no, you don’t need to zip, rename, or compress anything for Instagram. Just upload straight from the Photos app. That platform already crushes image quality, so don’t waste time trying to optimize for it.
How to Clean Up Your Gallery After Product Photography with iPhone
Let’s be honest, product photography fills your phone fast. You’ll take dozens of shots of the same item from slightly different angles. And unless you clean them out, they’ll clutter your storage, slow down your phone, and make it harder to find anything.
You could sort everything manually, but that takes too much time. Instead, use one of the great iPhone cleaner apps built for this. One solid option is Clever Cleaner: Free iPhone Cleaner. This app scans your photos, finds groups of similar images, and helps you delete the extras. It runs everything locally on your iPhone, so your media stays private. It also checks for things like screenshots, large video files, and accidental live photos you may have captured during your session.
Let’s walk through a common example of clearing out similar photos after a shoot. This will help the most, and once you get the hang of it, you’ll understand how the rest of the tools work.
Install Clever Cleaner from the App Store directly onto your iPhone.
Launch the app and give it access to your Photos. It will scan your library for similar or duplicate images.
Once the scan finishes, the app displays groups of photos that look nearly identical. You can press Smart Cleanup to delete everything it suggests, but pause before you do that. If your final product photo is still in the Photos app and not already saved to Files, the app might remove the wrong one.

Tap on a group. Go through the thumbnails. Deselect any photos you want to keep and mark the ones you don’t need. This gives you full control, and you avoid losing an image you meant to keep.
After you finish reviewing a group, tap Move to Trash. The app moves those photos into a temporary trash bin, so you can double-check before final deletion.
Open the Trash tab in the app. Make sure nothing important ended up there. Then slide the Delete bar. The app sends those images to the Recently Deleted album in your Photos app.

Go to Photos app > Recently Deleted and delete everything to free up space for your next shoot.
This entire process takes just a few minutes and clears out dozens or even hundreds of useless shots. Once you clean up your library, your iPhone runs faster, and you don’t waste time scrolling through throwaways when prepping your next project.
Conclusion
Well, that’s it. We didn’t cover everything, as this guide focuses on the basics you need to start product photography with an iPhone - the tools, setup, and workflow that actually work.
Photo editing deserves its own guide. That part takes time. You can test different styles for weeks or months before you find one that fits your brand. But if you plan to build a strong website or develop a recognizable personal brand, it makes sense to go the extra mile. The photos you share represent your product, and often, they speak louder than your words.
Don’t ignore other resources. YouTube holds just about everything you’ll need to sharpen your skills. Look for tutorials on macro lens product photography, editing walkthroughs for iPhone-only workflows, background and lighting setups for small products, professional tips on composition, framing, and storytelling, and more.
Take all the tips we gave above and apply them in your own way. Try things, make mistakes, and learn what feels right. You already have the tools, and you just need to use them. Everything will work out.

Login and write down your comment.
Login my OpenCart Account